Popular Posts

Showing posts with label Windows 7. Show all posts

Sunday, 19 December 2010

LOCK FOLDER WITHOUT ANY SOFTWARE


To do this just follow the steps given below
1. Suppose you want to lock the folder "games" in d: which has the path D:\Games.

2. In the same drive create a text file and type 
ren games games.{21EC2020-3AEA-1069-A2DD-08002B30309D}

3. Now save this text file as loc.bat

4. create another text file and type in it
ren games.{21EC2020-3AEA-1069-A2DD-08002B30309D} games

5. Now save this text file as key.bat

6. Now you can see 2 batch files loc and key.

7. Now press loc file and the folder games will change to control panel and you cannot view its contents. Press key file and you will get back your original folder.

Friday, 10 December 2010

Rumors of windows 8 launch in 2012..

People who are eagerly waiting for some news about Microsoft's upcoming OS "Windows 8", should get excited about today news.

Our friend site "winrumors" along with "windows8italia" is reporting that Windows 8 will sport a new GUI codenamed "Wind".

    Microsoft's next-generation Windows operating system will be 32-bit and 64-bit with two separate interfaces. The main interface will be codenamed "Wind" and will initially only be supported by high-end notebook and desktop PCs with dedicated video cards
    . The interface will require around 170MB of video memory.

    "Wind" will only activate on 64-bit copies of Windows 8 and will be fully 3D.

    "Wind" will be "fully dynamic" and able to adapt to user habits. Icons and shortcuts will adapt to different usage scenarios to speed up daily tasks. Windows 8 is also rumored to include a new fast hibernation system. The system will hibernate in around three to six seconds and save all open documents and running tasks.

A recent release of NVIDIA’s Quadro 265 driver specifically references a new kernel with the number 6.2 (Windows 7 is 6.1) and includes references to Windows 8:

    NVIDIA Windows Vista / 7 / 8 (64 bit) Display INF file
    DiskID1 = "NVIDIA Windows Vista / 7 / 8 (64 bit) Driver Library Installation Disk 1"
    NVIDIA_WIN8 = "NVIDIA"

So following are some interesting things about the claimed Windows 8 GUI codenamed "Wind":

    * It'll have 2 separate interfaces for 32-bit and 64-bit editions which is quite interesting and new thing.
    * New new GUI "Wind" will only activate in 64-bit edition. May be we find some way to activate in 32-bit editions as well. Who knows? ;)
    * "Wind" will be fully dynamic. Not sure but it might adopt Windows Phone 7 interface.
    * "Wind" will be able to adopt user habits. That sounds really impressive. :)

Monday, 6 December 2010

New skype.


Skype, the ever popular (but struggling) VoIP and video calling platform, officially releasing version 5.0 for Windows. The first thing regular users will likely notice is an overhauled interface that feels significantly more modern and clean than past versions. But the big news is that Skype will be integrating with Facebook using the social network's Connect feature. The interface will have a dedicated Facebook tab that displays your news feed, and will also place a call and/or SMS button next to your friends who have either a Skype name or cell phone number on file. You can also browse your Facebook phonebook, though apparently this only displays phone numbers, not Skype handles.

Otherwise, this is largely the Skype you've come to know and love. It still offers top notch voice and video calling, and supports 10-way group video calls. It's not clear when, or if, Facebook integration wil be coming to other platforms (like Linux, OS X or mobile apps), but it's a good bet the company is working to add the functionality across its offerings. You can download Skype 5.0 for Windows here.

Make a bootable USB installer for Windows XP, Vista, 7 with WinToFlash


Making a bootable USB flash drive for Windows Vista and Windows 7 isn't all that tricky, but it's always nice to find an app that simplifies things. Not only does WinToFlash make the process about as easy as it can get, but it can also create Windows XP, Server 2003, and Server 2008 installers.

The default options make it easy to roll a silent Windows install, or you can flip the custom switch and specify the exact setup parameters you want to use.

The handy app also has one more trick up its sleeve: moving Windows Preinstall environments. PE discs can be extremely handy for troubleshooting and repairs, and being able to painlessly zap them over to a USB flash drive means not having to burn a new copy every time someone's haggard old optical drive decides to chew up your CD.

WinToFlash is a free download and is totally portable. It's an excellent tool to add to your USB-related utilities.

Friday, 3 December 2010

Windows 7 Logon Reworked is a sexy welcome screen replacement

Just about everyone customizes his or her Windows desktop somehow, but most probably don't bother tinkering with the Welcome screen. After all, you really don't see it that often unless you're a stickler for security and always log off when you're AFK (which is a good habit to get into, really).

If that's how you roll, take a look at Windows 7 Logon Reworked. It's available in three variations -- the one you see above, another with the Windows logo embedded in the login box's glass border, and one more which is completely logo-free. As with a lot of other shell modifications, installing Reworked requires a little bit of tinkering in your system folder. You'll have to replace the stock Windows authui.dll in Safe Mode to do it -- check the author's instructions on DeviantArt if you need help and make sure you create a backup before making any changes!

Both 32 and 64-bit versions are available for all three styles, and there's also a snazzy Aurora-inspired replacement background should you want to change that as well!

VistaSwitcher is a beautiful Alt-Tab replacement

vistaswitcher
VistaSwitcher is a beautiful Alt-Tab replacement. It's aimed mainly at Windows Vista and 7, but it also works under Windows XP.
You get a huge thumbnail of the destination window; it's far larger than the one that comes with the "stock" Alt-Tab. Another neat feature lets you Alt-Tab between the windows of just one application. It's kind of like pressing Win+[number] in Windows 7, but you don't have to look at the taskbar and count the icons in order to see what the number is for the application that you want to switch to. That's done using Alt+` (backtick) by default, but it's configurable.
VistaSwitcher also introduces one feature that I've never seen before: Alt-Tabbing between the windows on the current monitor only. I use two monitors, but I'm not convinced that this is a handy feature. Still, it's certainly innovative and can help split your desktop into two distinct workspaces.
One thing that bugs me about VistaSwitcher is that it looks very similar (visually) to another Alt-Tab replacement that I saw a long time ago (but, for some reason, I can't find it now). I'm not saying it's a clone; it certainly innovates on its own, and it seems to be a very interesting application. It definitely looks like another application, though. Help me out in the comments.

Logon Screen customizes your Windows 7 welcome screen

The default Windows 7 welcome screen looks fairly nice, but it's not customizable out-of-the-box like the rest of your desktop is. There are, however, plenty of free apps that allow you personalize the background and add text messages -- and Logon Screen is a good option.

Just install Logon Screen, browse for the picture you'd like to swap in, and configure any advanced options you'd like. In addition to changing the background, Logon Screen allows you add a customized notice and tweak button appearance. If you like, you can also require users to press Ctrl+Alt+Del prior to logging on, hide users' accounts, display information about who was last logged in, and enable or disable shutdown options.

Thursday, 18 November 2010

A small tutorial for real media

You may find this helpful if you donwload hundreds of short episodes in rm format like me and tired of double-click to open next files.

Very easy. Use notepad to open a new file, type this inside:
file://link to file1
file://link to file2
(type as many as you want)
Close file. Rename it to FileName.rm

Then you`re done!!!!

Ex:
I put my playlist file here: C:\Movies\7VNR
And the movie files are in C:\Movies\7VNR\DragonBall

Then inside my playlist file I`ll have something like this:

file://DragonBall/db134.rm
file://DragonBall/db135.rm
file://DragonBall/db136.rm
file://DragonBall/db137.rm
file://DragonBall/db138.rm

Sunday, 14 November 2010

Increase Security by Enabling Account Lockout in Windows 7

Although having separate Windows7 user accounts increases security, there are a few disadvantages to overcome when there are many user accounts associated with one computer. The most important of these disadvantages is that more accounts mean that a hacker has that many more opportunities to gain unauthorized access to thecomputer or server.
One way to combat this disadvantage is to enable certain account policies that automatically limit a hacker’s ability to gain access to a user’s account. Enabling account lockout policies is one of the most powerful ways to thwart thieves, hackers, and other people wanting to steal your files, personal information, or other sensitive information .

Why Enable Lockout Policies?

Enabling lockout policies helps prevent unauthorized use of someone’s Windows 7 account. Of course, it doesn’t completely prevent unauthorized access; it simply makes it much harder for someone to continually input password after password when trying to gain access to someone’s account.
In work environments, employees often share account information such as usernames and passwords. Often, one employee will try to use another employee’s account by guessing at the password. Some social engineers will try to gain as much information about a user’s password and then attempt an intelligent guessing attack by trying different combinations of a password on an account. For these reasons and others, it makes sense to enable an account lockout policy.

How to Enable Windows 7 Account Lockout Policies

There are three Windows 7 policies associated with account lockouts. To view the current settings for these polices, begin by logging into Windows 7 with an account that has administrative privileges. Then, click on Start>All Programs>Administrative Tools>Local Security Policy.
Click on Local Security Policy
In the left hand pane of the Local Security Policy window, locate and click on a folder titled Account Policies and then on the folder titled Account Lockout Policy.
Windows 7 Account Lockout Policy
Notice that there are only three policies located in the right hand pane. These are the policies that control account lockout. Right click on the policy titled Account Lockout Threshold and choose Properties from the menu. This policy is the one that enables account lockout and allows you to set values for the other two policies.
Account Lockout Threshold Policy
The Account Lockout Threshold is a security setting that determines the number of failed login attempts before that account is locked out. Possible values for this policy range from 0 to 999. A value of zero means that accounts are never locked out regardless of the number of failed login attempts.
Set this value to a reasonable number such as 5. You need to leave at least a few failed login attempts because of a misremembered password or because the user accidentally has Cap Locks on while attempting to login.
Click the OK button and notice that Windows 7 recommends you set the next two policies to 30 minutes each. Click the OK button and locate the next policy titledAccount Lockout Duration. Right click on it and select Properties from the menu.
Account Lockout Duration
Notice that Windows 7 has already set this policy to 30 minutes. This policy sets the number of minutes an account that has been locked out remains locked out before it is automatically unlocked.
30 Minute Account Lockout Duration
You can set the account lockout duration to any value between 0 and 99,999 as long as it is equal to or greater than the Reset Account Lockout Counter Afterpolicy. After setting the Account Lockout Duration variable, click OK and locate the policy titled Reset Account Lockout Counter After. Right click on this policy and select Properties from the menu.
Reset Account Lockout Counter After Policy
Notice, again, that Windows 7 has set this policy to a value of 30 minutes. TheReset Account Lockout Counter After policy sets the number of minutes that must elapse after failed login before the failed login counter resets back to zero. The value for this policy can be anything from 1 to 99,999 minutes but must be equal to or less than the value set for the Account Lockout Duration policy’s value.
30 Minute Reset Account Lockout Counter After Policy
Enabling the account lockout policies on your Windows 7 PC can increase security by reducing the number of times a user or an unauthorized individual can attempt to login to the computer.
However, setting the number of failed logins before lockout too low can increase administrative workload to the point of annoyance for both computer technicians and users. Be careful about the values you set for the three lockout polices to strike a balance between security and usability.

Use Windows Firewall to Block Out All Incoming Connections to Windows 7

With breaches in home computer security at an all time high, it is no wonder why Microsoft built the Windows Firewall application right in to the last few versions of Windows.
Using Windows Firewall, you can lock out all incoming connections to maximize your computer’s security. This is especially useful when transporting your laptop from your home to a public Internet connection.

Why Lock Out All Incoming Connections?

Internet service providers (ISPs) such as Time Warner RoadRunner allow subscribers to stay connected to the web as long as the computer remains on. This is a great feature for fast internet access but can leave your computer open to attacks.
Windows Firewall is an application that plugs the holes in your network that don’t need to be open for you to connect to the Internet , to public networks, or to your home network. Using Windows Firewall in Windows 7, you can lock out all incoming connections, override any other network policies, and maximum the security of your PC.

How to Use Windows Firewall to Lock Out All Incoming Connections

Begin by clicking on Start>Control Panel>System and Security>Windows Firewall.
Open Windows Firewall Settings
You’ll notice that you can set options for two types of networks: Home/Private andPublic. This is where many people get confused about networks. You see, although your ISP  subscription allows you to connect beyond your home network to the web, your local area network (LAN) connection to the web is still considered a home/private network.
In Windows 7, private networks are those that take advantage of a homegroup. Public networks, such as when you connect to the web in a hotspot, in a coffee shop, etc., do not.
Therefore, you only need concern yourself with the Home/Private network for connections in the home and Public network when you connect to the web outside the home. To the left of the window, click on the link titled Turn windows firewall On or Off.
Turn Windows Firewall On or Off
You should now be looking at the Windows Firewall Customize Settings window. Notice that there are separate settings for the two types of networks:Home/Private and Public. If you are like more people, you have the setting titledTurn On Windows Firewall chosen for both types of network.
Windows Firewall Settings
Notice that under each type of network, there is an option labeled Block All Incoming Connections, Including Those in the List of Allowed Programs. Checking this option for either the Home or Public network type will block all incoming connections.
Note that this includes those connections that have already been approved in the list of allowed programs. Use this option with caution because you may disrupt connections necessary to do what you want to do on your networks.
There are a few good reasons to use this option. First, if you are connected an unfamiliar or unsecured network, you can temporarily use this option to protect yourself. When you disconnect from the network, you can uncheck this option.
Second, if you need to upgrade, uninstall, or install protection software such as an antivirus application, you can lock out all incoming connections to temporarily protect yourself until the installation is complete.
Finally, there may be times when you suspect that malware has been installed on your computer. To avoid any incoming communications until the problem is fixed, consider locking out all incoming connections to avoid adding more problems to the issue.

How to change the default location for installing applications in Windows

One way to do this is to install applications on a drive other than the drive where Windows is installed. So by default, most computers will have Windows installed on the C partition and most programs will be installed in C:\Program Files.
Of course, whenever you install an application, there are some system files that have to be installed into Windows directories on your C drive, but it still can take a major load off your Windows partition if you’re running very data intensive applications like Photoshop, video editing software, etc.
If you have a desktop computer, it might actually be much better because you could pop in a secondary drive that is much faster than the original drive. Also, you might be asking yourself “Well why would I change the path in the registry when I can choose the path I want to install to during the program setup?”
Good question! Well, for two reasons: some programs don’t give you an option of where to install the app to and sometimes you might just forget to change it manually.

How to change default install path for applications in Windows

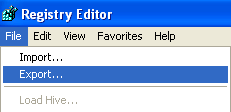
You can do this by making a quick change to the registry. Firstly, you’re going to want to make a backup of your registry before making any changes. You can back it up by opening the registry editor and choosing File and then Export.
export registry
To get into the registry, click on Start, then click on Run and type in regedit. In Windows Vista, just type in regedit into the instant search box and press Enter. Now navigate to the following key:
HKEY_LOCAL_MACHINE\SOFTWARE\Microsoft\Windows\CurrentVersion
Now look for a key in the right pane called ProgramFilesDir. You should see that the value is C:\Program Files.
programfilesdir
Now you can simply double-click on the value and edit it to whatever you like, i.e. “D:\My Apps\”. Whenever you install a new program, Windows will use the new location as the default installation directory. Nifty! Source: TechBold
[tags]change default installation directory, windows install path, change default install path[/tags]

Change yout IP address

How To: Change Your Ip In Less Then 1 Minute

1. Click on "Start" in the bottom left hand corner of screen
2. Click on "Run"
3. Type in "command" and hit ok

You should now be at an MSDOS prompt screen.

4. Type "ipconfig /release" just like that, and hit "enter"
5. Type "exit" and leave the prompt
6. Right-click on "Network Places" or "My Network Places" on your desktop.
7. Click on "properties"

You should now be on a screen with something titled "Local Area Connection", or something close to that, and, if you have a network hooked up, all of your other networks.

8. Right click on "Local Area Connection" and click "properties"
9. Double-click on the "Internet Protocol (TCP/IP)" from the list under the "General" tab
10. Click on "Use the following IP address" under the "General" tab
11. Create an IP address (It doesn't matter what it is. I just type 1 and 2 until i fill the area up).
12. Press "Tab" and it should automatically fill in the "Subnet Mask" section with default numbers.
13. Hit the "Ok" button here
14. Hit the "Ok" button again

You should now be back to the "Local Area Connection" screen.

15. Right-click back on "Local Area Connection" and go to properties again.
16. Go back to the "TCP/IP" settings
17. This time, select "Obtain an IP address automatically"
tongue.gif 18. Hit "Ok"
19. Hit "Ok" again
20. You now have a new IP address

With a little practice, you can easily get this process down to 15 seconds.

P.S:
This only changes your dynamic IP address, not your ISP/IP address. If you plan on hacking a website with this trick be extremely careful, because if they try a little, they can trace it back

Aerotuner fine tune aero theme settings in windows 7


AeroTuner is another excellent tool created by our friend "hb860". It allows you to tweak various Aero theme options which can't be customized by default.
With the help of this tool:
  • You can enable/disable transparency in windows.
  • You can customize color balance
  • You can customize after glow color balance
  • You can customize blur balance
  • You can customize Aero stripes
In other words, you can customize the whole Aero UI with this tool.
You can download it using following link:

Downloading windows media streams

Downloading Windows Media Streams

Look for the video source url in the webpage source code and copy it:
user posted image
To view the source code, r-click on the webpage that plays the video and select "view source." If unable to do so, just close the window and in the main Internet Explorer (IE) window, click the History icon or press Ctrl+H. Look for the same webpage on the left pane. On the menu, click View > View source.

Paste the video source url in Windows Media Player. (File > Open URL... )
Let the video play now. When the correct title appears on the playlist pane, r-click on it and select "Properties."
Select the source url and copy it:
user posted image

tongue.gif Paste this url in Flashget to download the video clip.

Regedit.exe & Regedt32.exe, Whats the difference......

Have you ever noticed that there are two versions of the Registry Editor on your computer? Ever wondered why? Well let me just give you a little insight!

It all depends on your Operating System. If you have Windows 2000 :

Regedit.exe

Regedit.exe is included with Windows NT 4.0 and Windows 2000 primarily for its search capability. You can use Regedit.exe to make changes in the Windows NT 4.0 and Windows 2000 registry, but you cannot use it to view or edit all functions or data types on Windows NT 4.0 and Windows 2000.

The following limitations exist in the Regedit.exe version that is included with Windows NT 4.0 and Windows 2000:

You cannot set the security for registry keys.
You cannot view, edit, or search the value data types <>REG_EXPAND_SZ and <>REG_MULTI_SZ. If you try to view a <>REG_EXPAND_SZ value, Regedit.exe displays it as a binary data type. If you try to edit either of these data types, Regedit.exe saves it as <>REG_SZ, and the data type no longer performs its intended function.
You cannot save or restore keys as hive files.
Microsoft recommends that you use Regedit.exe only for its search capabilities on a Windows NT 4.0-based or Windows 2000-based computer.

Regedt32.exe

Regedt32.exe is the configuration editor for Windows NT 4.0 and Windows 2000. Regedt32.exe is used tomodify the Windows NT configuration database, or the Windows NTregistry. This editor allows you to view or modify the Windows NT registry.The editor provides views of windows that represent sections of theregistry, named hives. Each window displays two sections. On the leftside, there are folders that represent registry keys. On the right side,there are the values associated with the selected registry key. Regedt32 isa powerful tool, and you must use it with extreme caution when you changeregistry values. Missing or incorrect values in the registry can make theWindows installation unusable.

Note: Unlike Regedit.exe, Regedt32.exe does not support importing and exporting registration entries (.reg) files.

Or..Windows XP and Windows Server 2003

Regedit.exe

Regedit.exe is the configuration editor for Windows XP and Windows Server 2003. Regedit.exe is used tomodify the Windows NT configuration database, or the Windows NTregistry. This editor allows you to view or modify the Windows NT registry. It supports setting security on registry keys, viewing and editing <>REG_EXPAND_SZ and <>REG_MULTI_SZ, and saving and restoring hive files.On the leftside, there are folders that represent registry keys. On the right side,there are the values associated with the selected registry key. Regedit isa powerful tool. You must use extreme caution when you use it to changeregistry values. Missing or incorrect values in the registry can make theWindows installation unusable.

Regedt32.exe

In Windows XP and Windows Server 2003, Regedt32.exe is a small program that just runs Regedit.exe.

How To Use You Gmail With Msn Messenger

I think all of you know it but if someone dont than here it is
go to this page:

https://register.passport.net/default.srf?sl=1

Enter you gmail account as the email address

fill all the other blanks and continue the registration

Go to your gmail account and verify the registration and know sign in with msn
Actually this works will all emails not only gmail..

Auto End Tasks to Enable a Proper Shutdown In Windows 7

This reg file automatically ends tasks and timeouts that prevent programs from shutting down and clears the Paging File on Exit.
1. Copy the following (everything in the box) into notepad.
QUOTE
Windows Registry Editor Version 5.00
[HKEY_LOCAL_MACHINE\SYSTEM\CurrentControlSet\Control\Session Manager\Memory Management]
"ClearPageFileAtShutdown"=dword:00000001
[HKEY_USERS\.DEFAULT\Control Panel\Desktop]
"AutoEndTasks"="1"
[HKEY_LOCAL_MACHINE\SYSTEM\CurrentControlSet\Control]
"WaitToKillServiceTimeout"="1000"
2. Save the file as shutdown.reg
3. Double click the file to import into your registry.
NOTE: If your anti-virus software warns you of a "malicious" script, this is normal if you have "Script Safe" or similar technology enabled.

How to Use god mode in Windows 7

Windows 7 is now becoming popular among windows operating system  users.Windows 7 has cool hidden feature ,people calls it godmode in windows 7.GodMode is a folder that brings together a long list of customization settings allowing you to change all your settings from one place.This is very good as you can now change all your windows settings from one single place.
God Mode in Windows 7
Foll the following steps to create god mode folder:
1. Create a new folder
2. Rename the folder to GodMode.{ED7BA470-8E54-465E-825C-99712043E01C}
You can change word GodMode to any other word you like your name or your friends name

3.The folder icon will change ,then  double click it to show the GodMode windows options

Saturday, 13 November 2010

10 SEcurity Enchancements for your PC

1. Check Windows Update and Office Update regularly. Windows Me, 2000, and XP users can configure automatic updates. Click on the Automatic Updates tab in the System control panel and choose the appropriate options. Vista and Windows 7 users can select Updates from the control panel. Note, if you are visiting the microsoft product update sites from Mozilla Firefox, you might get notification which will ask you to use Internet Explorer

2. Install a good antivirus program. Avast and Avira are the best available in the market for free. Avast is recommended as it provides fast updates and responds quickly to virus attack / outbreaks. Avast Antivrus is available for Linux platforms too. If you can shell out cash on this, we would recommend you NOD32 from Eset.

3. Install a personal firewall. Free Firewall versions for home usage are provided by SyGate, ZoneAlarm and Comodo. Keep track of the updates. These days updates are also notified via RSS feeds. So, it is wise to subscribe to one of the update notification feeds.

4. Install a spyware blocker. Make sure that you regularly update your spyware blocker.  Spybot – Search & Destroy is by far the best available in the market. The best part is it all comes for free.

5. Install and Use a good Web Browser. We would recommend you a switch from Internet Explorer to Mozilla Firefox or Google Chrome. If you already are using Mozilla firefox then you must install the Adblock Plus Ad-Blocker, NoScript to stop execution of any potentially harmful javascripts. You should also install Sandboxie, which runs your programs in an isolated space which prevents them from making permanent changes to other programs and data in your computer.Google Chrome has Sanbox feature enabled by default.
6. Block pop-up spam messages in Windows NT, 2000, or XP by disabling the Windows Messenger service (this is unrelated to the instant messaging program). Open Control Panel | Administrative Tools | Services and you’ll see Messenger. Right-click and go to Properties. Set Start-up Type to Disabled and press the Stop button. Bye-bye, spam pop-ups! Any good firewall will also stop them.

7. Use strong passwords and change them periodically. Passwords should have at least six characters as a safety issue; use letters and numbers and have at least one symbol. A very nice example would be t%6Y_u&5fT. Complex passwords will make it much harder for anyone to gain access to your accounts.

8. You should use Mozilla Thunderbird as your default mail client along with available security extensions. If you’re using Outlook or Outlook Express, use the current version or one with the Outlook Security Update installed. The update and current versions patch numerous vulnerabilities.

9. Use MAC filtering, turn off SSID broadcast, and use WEP key protection with the biggest key you can think of if you are using a Wireless Network.Such networks are known to be easily susceptible to eavesdropping and hacks.

10. Subscribe to a good wiresless security blog or a good web security mailing list so that you can stay up-to-date with current online security scenario and act accordingly.

Friday, 12 November 2010

Convert File System, FAT - FAT32 to NTFS without loosing your data..

Open a dos prompt and give the command

convert d: /fs:ntfs

this command would convert your d: drive to ntfs.

if the system cannot lock the drive, you will be prompted to convert it during next reboot.

Normally you should select yes.

Conversion from fat/fat32 to ntfs is non-destructive, your data on the drive will NOT be lost.

Be aware that converting to ntfs will make that partition of your
drive unreadable under dos unless you have ntfs utilites to do so.